


-Takano's Thrilling Guitar Tinkering -Maintenance for Beginners|
You've bought a guitar, but do you need to take care of it? You may be thinking, "I've never touched a guitar before, so I'm not sure if I should even start playing! Don't think too hard! It is true that maintenance is very important to get the most out of your guitar (i.e., to make it easy to play)! But it's not that hard if you do it often. You have taken the trouble to acquire a guitar, so you want to keep it in the best condition possible with simple daily care. Practicing on a guitar that is easy to play will make you feel good, and most importantly, it will help you improve faster!
Here is a beginner's guide to guitar maintenance to help those who have just started playing or are thinking about starting.


It would be disappointing if your precious guitar is covered in fingerprints or dust. There are a variety of cleaners and other care products available on the market, but if you take good care of your guitar every day, just wiping it dry with a cloth is enough. However, it is not possible to do this every day, and there are places that are hard to reach, such as under the strings, so you should clean and polish your guitar while you are changing the strings.
Introduction of care goods
Cloth, lemon oil, fingerboard lubricant, contact revival material, polish


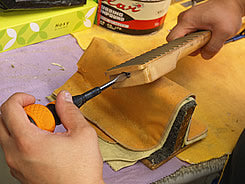
First, use polish to wipe the guitar body. If the guitar is heavily soiled with dust, wipe it dry to remove most of the dirt, and then use the polish. If your guitar has a lacquer coating, be sure to choose a polish that is labeled "lacquer compatible.
Apply a small amount of polish to a cloth and polish. If you apply too much polish, it may end up cloudy. The trick is to wipe in one direction.
Around the PU bridge
Now that you have taken the trouble to remove the strings, it is time to clean the areas that are normally inaccessible.
|
|
|
Pickups can be removed by unscrewing the four screws on the escutcheon. |
|
|
|
|
|
|
|
The sides of the pickups are very easy to get dust on. |
|
|
|
|
|
|
|
Also, on the back side of the pickup, there are often unexpected discoveries such as the model or the year of manufacture. The guitar in the photo is a YAMAHA SA200S. If you remove the pickup of the SA200S, you will find "SA 56.5.9". This is a stamp date of May 9, 1981. This kind of find is interesting. |
|
|
|
|
|
|
|
|
|
|
|
The bridge is another area that is usually hard to clean when the strings are on. I put a cloth under the saddle and wipe it from side to side.
It is better to remove the saddle for better cleaning, but this method is also good for quick and easy cleaning. |
|
|
|
|
|
|
|
Check for loose screws. Are the pickguard and escutcheon screws loose? Another very common problem is a loose jack nut. If this nut is loose, you will hear a rattling noise. Use a box wrench to tighten it,Be sure to remove the entire plate and hold it from the back side as well.Tighten the screws after removing the entire plate and holding it from the backside. If you tighten it from only one side, the jack itself will also turn and the wiring may be twisted. |


Apply a protective oil such as lemon oil to the rose fingerboard. This protects the fingerboard from drying out. Be careful not to apply too much. After applying an appropriate amount (a few drops is OK), wipe it off with a dry cloth. (I have experienced rusting of the frets because I applied too much and left it for a long period of time. Maple fretboards do not need oil.

As long as you play the guitar, you will be doing this work for a long time. Rusty strings will cause chattering and will not produce a clean tone, nor will they be in tune. If the strings are not wound properly, they will also be prone to chattering and tuning errors. It may sound a little complicated, but if the strings are not properly wound, you will not be able to improve your guitar playing.
Necessary Tools
Nippers, winders, wrenches, scales, screwdrivers, box wrenches

Strat section
Six pegs in a row in the same direction on either side are called "6L". Shearer type (right) and Kluson type (left) are commonly used on strats.

The winding method differs slightly depending on the shape of the string post.
If there is a hole next to the string post

If the hole is too long, the string will not be wound enough, and this will lead to tuning deviations. If it is too short, it is no good. The rule of thumb is to wind the string around 2-3 times.Here is a point! How long are two or three wraps? It seems that many people are confused here. A good rule of thumb is two to two and a half pegs! If you use this length as the winding length, it is a good length.

It is a good idea to mark a crease as a marker.

This length is about 2 to 3 rounds.

When stringing the first and second strings, try to assume that there is a string post beyond that point.
Next, wind the string in a counter clockwise direction starting from the string post. Wrap one week on the upper side of the string through the hole,

After that, wind downward.
The string post is placed between the top and bottom of the string. The strings should be wound in such a way that there are no gaps or crossings between strings.

This is a bad winding method because the strings overlap each other. This is not a good way to wind the strings, and the tuning will not be stable.

If there is a hole in the top of the string post

In this case, insert the string from the top of the hole until it hits the bottom and bend it to the left or right. This is the depth of the hole in the string post.

The difference from the previous peg with the horizontal hole is that you cut the string before winding it. Next, we add the length of the current hole depth to the length of the string post described in the previous section, and cut off the part beyond that with nippers, since it is unnecessary. However, it is not a good idea to just say, "Oh, I see," and cut it off with a snap. The impact of the cut may cause the core wire and the winding wire of the string to separate. It is better to cut the end after bending it as shown in the picture.

After that, wind the string in the reverse direction toward the bottom. Be careful not to cross each other.
Les Paul version
The 3:3 is symmetrical with 3 strings on each side. The direction of winding is clockwise for the 1st, 2nd, and 3rd strings, and counter clockwise for the 4th, 5th, and 6th strings.

Basically, it is the same as "when there is a hole next to the string post" as explained in the Strat section, but the length of string winding is about one and a half pegs. Note that this may not be the case depending on the height of the string post.
String life
How often should strings be changed? The most common answer is about one to two months. Of course, it depends on how often you play the guitar, but if you just play as a hobby, that's about right. However, it is not unusual for guitarists who play for a living to replace their guitars every time they play. Also, wiping the strings with a dry cloth or spraying them with something like Slide Move and wiping them dry after each performance will prolong the life of the strings.
It is also common for one string to break, but unless you have just replaced it with a new one, it is better to replace all the strings.

The distance between the surface of the neck and the strings is how far apart the strings are. Strictly speaking, it is the gap between the top of the fret board and the bottom of the string. 12 frets are measured on the first and sixth strings with a scale.

There is a proper string height setting for each guitar, but in general it is between 1.5mm and 2.0mm at the 12th fret on the 1st string side, and 2.0mm at the 12th fret on the 6th string side. This is just a guideline and there is no correct answer. However, this height is a very important setting item that directly affects the actual playability and, in detail, the sound. Low string height increases playability, but a low string height setting can lead to chatter. A higher string height setting requires a stronger grip to hold the strings, which may be inconvenient when using techniques such as fast playing. However, the tension of the strings will be stronger, so the sound will be better. Find the string height that suits you and your guitar according to your playing style and preferences.
Strat version
The Strat is adjusted by changing the height of the saddle screw on each string. There are two types of hexagonal wrenches: inch size (1,27mm) and millimeter size (1,5mm). Generally, the millimeter size is used for guitars made in Japan, while the inch size is used for guitars made overseas. The saddle should be set so that it is in line with the curved surface (called "R") of the fingerboard.Here is a key point!The saddle itself should be parallel to the bridge!

It is rare to see a guitar with the saddle itself set at an angle.This is wrong!This is a mistake.

Les Paul version
The bridge on a standard Les Paul does not allow for fine tuning of each string, so once the adjusters on the 1st and 6th strings are set, the other string heights are set naturally. It is best to set the bridge from a slightly higher position to a lower position.


Even though you have tuned the strings properly using a tuner, when you play the high position strings, you may feel that the tuning is not quite right. Simply put, when you press down on an open string, tension is applied to the string to the extent that you press down on it, which naturally raises the pitch of the string. Octave tuning is to compensate for this by lowering the bridge position.
First, tune the instrument as usual using a tuner. Next, move the saddle back and forth so that the pitch of the actual note at the 12th fret matches the pitch of the harmonics at the 12th fret.
*If the actual note is high, move the saddle backward; if it is low, move it forward.

What are harmonics?
Harmonics is picking the position just above the fret of the string with a light touch, rather than pressing down on the string. If you are not used to this, you can leave your fingers touching the strings. Even so, you can still produce a sound somewhat like harmonics. When you get used to it, you can release your finger at the timing of picking to produce a beautiful "pawn" sound.
Octave tuning should be done when you replace the strings with new ones, and when the neck condition and string height have been adjusted.

Since this feature is originally intended as a "Beginner's Guide to Maintenance," I thought it might be a good idea to write about what happens next, but since the process of changing strings, adjusting the neck, setting the string height, and octave tuning is part of a set, I will briefly introduce the process. If you are not sure how to adjust the neck, please don't force yourself to do so, and always ask a music store for help.

When the strings are strung (in tune), the neck of the guitar is subjected to an additional weight of about 70 kg. Although the neck of a guitar is designed to withstand this weight, the neck will warp due to temperature, humidity, or prolonged exposure to the elements. There are two main types of neck warping: forward warping (see below) and reverse warping (see below). When the neck warps, the string height becomes high, making it difficult to play, or conversely, the strings hit the frets and the sound is choked. To prevent this, an iron rod called a truss rod is installed in the neck, and by turning this truss rod, the warped neck can be corrected to some extent. There are two types of truss rods: one to be adjusted from the head side and the other from the neck joint side.

The truss rod is adjusted from the head side.

The truss rod is adjusted from the neck joint side.


The type adjusted from the head side is done with a pipe wrench or hexagonal wrench. There are various sizes of wrenches, and some are included with the purchase of the guitar. Please note that if you use an incorrect size wrench and turn it too hard, it may tarnish the head end, making it impossible to adjust the head end.
If you want to adjust the forward warp, turn the wrench clockwise. At this time, do not turn too much at once. Turn a little at a time and see how it goes. Repeat this process. If the neck is warped in the opposite direction, turn in the direction opposite to clockwise. Some necks are less effective on the reverse side, and some are more effective. If this does not work, please consult a professional such as a music store.
The same applies to the neck end side. There are two types: a hexagonal wrench type and a cross-shaped type. For the cross-shaped type, use a large flat-blade screwdriver.
Also, this truss rod requires a little experience and knowledge to handle because it may break or come off from the fixed part on the opposite side if it is turned too hard. If in doubt, do not force it and consult a music store.
How was it? This is the beginner's level of maintenance in the "Doki-Doki Guitar Tinkering" series. If you can do this, you should be able to practice comfortably at any time with peace of mind. If the above does not solve your problem, leave it to a professional. As I mentioned earlier, practicing on a guitar that is easy to play will help you improve at a much faster rate.
I hope I can be of some help to you in improving your guitar playing.